Monday, November 10, 2014

Happenings at the studio before winter

Welcome, Thanks for reading or at least checking out the pictures. I've been bounced around with work and no work at my "full-time" "big kid job". I left off with introducing you all to the new studio. I have more pictures I'd like to show about the progress. The cold blooded building is still cold blooded and its starting to show its cold side this time of year. The repairs to the building have helped a lot with the heat in the basement. I've piped in some heat from upstairs and have also introduced a few new tools and one helps heat the place up. Along with studio upgrades and tinkering, there is progress on my metalwork as well.


First off, The air compressor that my friends Matt and Jenn Gave me started leaking at the relay switch, so I took apart and the springs flew out and I couldnt get them back together until I already bought the new/used militarty surplus compressor pictured below. Got it locally on craigslist. Its from the 60's or 70's, its much bigger and was quiter with the old one cylinder setup pictured. It took too long to fill so I switched out the two cylinder compressor and motor from the old compressor. There were many unforeseen problems which lead to more swapping of parts and modifications, but it works fine now. 
 So I managed to create my first vessel from within Mjolnir studio I haven't titled it yet but its forged and fabricated copper with green patina and burnishing.

 The Viking/Dragon ship is coming along slowly but surely. There's always a tool or material I have to make or need to order to get much of anything done on it. The hull of the ship is roughly completed. I'm waiting on some casting supplies in order to cast the head and tail. These cast pieces will replace the sheet copper bow and stern. If things go much longer without success I will have to chase and repousse 4 pieces of metal to complete a head and tail for the vessel.

 The keel of a viking ship is the long timber that runs the length of the ship on the bottom. It's what all the side planks of the ship were built off of. It gave good structure to the vessel and yet allowed flexibility to aid in sea voyages. Later on the keel also helped support the mast of the ships through a series of crossbraces.
The keel on my vessel commission was formed using a modified flat-head screwdriver and a vice to support and stretch the metal into shape. 
 Below the sculpting clay version of the dragon head which will be used in the casting process.

 Went to an auction with Lyle a while ago. It was our first auction in which we were bidding. It was a learning experience but I know we did well as we left, we felt like vikings that raided a village and got away with the loot. I Went to the auction for the whole purpose of getting a belt/disc sander. I emptied my bank accounts and went to the auction. Little did we know the auction would start at 9am and we wouldn't get done transporting our spoils to storage and studio until about 6pm. Regardless, all the money I had wasn't enough to get a really cheap camper or oxy-propane torch but I did manage to get the belt-disc sander, and a 390 pound McEnglevan (MIFCO) slot hearth forge and Lyle picked up a next to new lincoln welder and Milwaukee drill. I'd say we did pretty awesome for our first auction. Cant come across deals that good very often. Lots of stuff went for less than scrap prices. Someone got a ~12foot Pittsburgh metal lathe for $120 with all the attachments.
 Even though we're getting low on room in the studio we still had to get the tools and the forge down the steep steps into the basement. The previous owner helped Lyle and I get the forge in the truck with a crane after I took the truck cap off. It took three of us to get it out of the truck and into temporary storage at my garage. So getting it in the truck again and down the into the studio was going to be a big issue. The forge had 2-3" of clearance to make it down and through the basement door.

 Scrap lumber and a leftover I-beam segment from fixing the basement door frame was used in making this 12' long crane rig.

 Got a cheap winch and mounted it in my truck box with metal supports under the box to bolt into. The bed-liner in the truck is there for support because the truck has rust holes. Replacing the crank with my cordless drill made for a quicker loading and unloading operation.
 The winch was used to pull the forge up into the truck on a 4x4 wooden ramp with angle iron guides and bracing in between to eliminate shifting rails and it kept the wheeled base I made for the forge from tracking off the boards. 
 ^ me with the forge.
 Above, the forge is loaded in my truck and the rail is brought with. I made the rail just long enough to fit from the top of the studio stairs to the bottom
Ready to lower it off the truck with the winch and onto the platform to go down. Once off the rail, the rail was moved into the stairwell and screwed into place. Below you see the safety chair and wooden spool, Carefully placed to optimize cushion on impact in case the 398 pound forge decided to take a tumble. It was more of a joke but it might have helped. haha. The stairs are right inline with an old concrete support pillar for the old building. building built in 1865, basement added before 1939 if it wasn't original.
We may have been a little extreme in our safety measures pictured below but we weren't sure how everything was going to go. We prepared... Better to be safe than sorry.

 Planning the function and brainstorming safety issues while drinking.
 Bracing the side of the rig in case it decided to tilt one way or another.
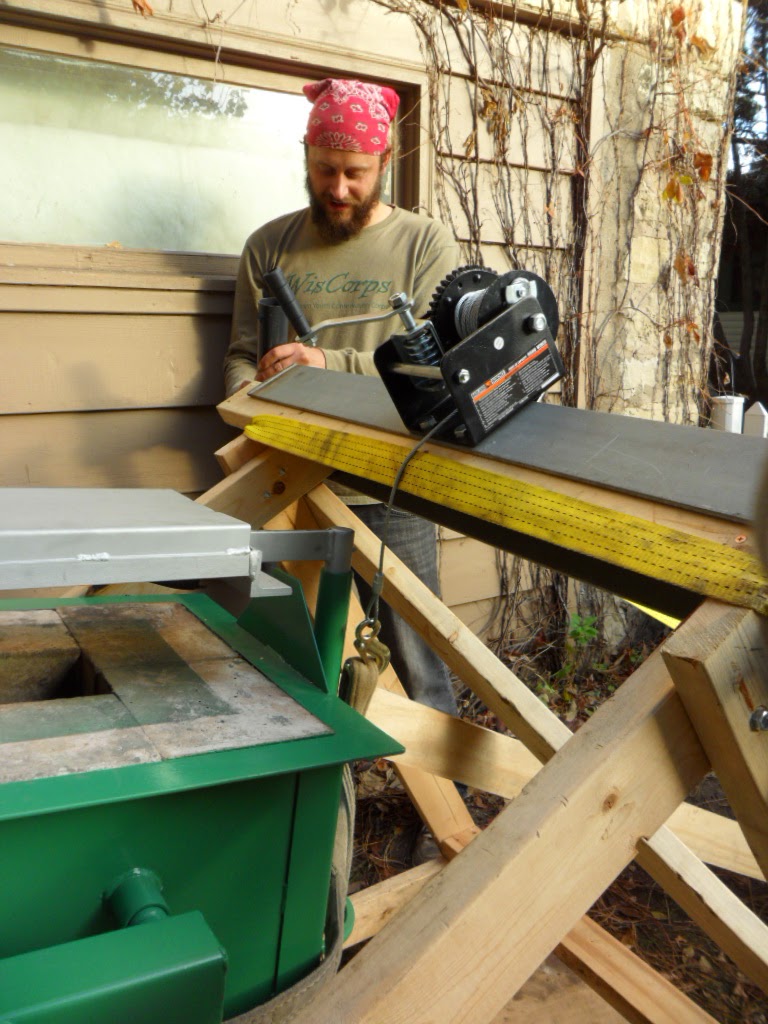
 Very steep stairway. You can see how the wooden rig fit right into the I-beam above the doorway to give it support.


 A big thanks to the lovely Sabrina for photo documentation assistance. :)


 Two wheels over the bump and starting down


 It's a good idea to have something like a rug or blanket over a cable under tension. If it breaks, it gives some wind resistance and weight to slow the cable and hopefully prevent loss of limbs or what-have-you... Lyle below on the load strap keeping the rolling load lined up on track.
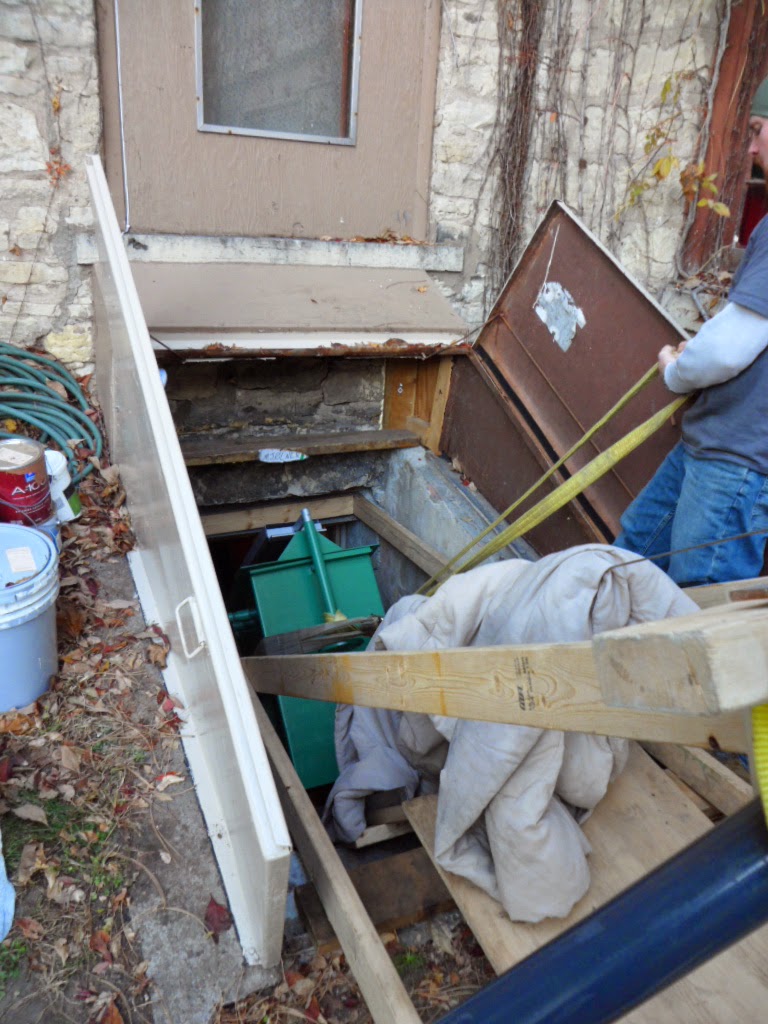
 Barely any clearance going through the downstairs door.

 Success!


 I want to give a big thanks to Lyle for helping with this endeavor and Sabrina for bringing snacks and documenting thee process. I want to thank you for checking out my site and I hope you enjoyed it or learned something new.

Best wishes,

Adam O.

Sunday, July 27, 2014

Mjølnir Studio

Mjølnir, myol-n(ee)r is a name derived from Norse mythology and was chosen as the name for my newly acquired studio. Mjølnir is the name of Thor's hammer and seems to be appropriate for a metalsmithing studio where my friend Lyle and I, both of Norwegian heritage, hammer metal. It's been a long process getting the space fixed up and, therefore, not a lot of newer work has been made. However, a lot of work has been accomplished in the studio.  I posted pictures below of the space after a majority of the debris was cleaned out.

 So I found a studio in the basement of an old church built in 1865. I had worked with the landlord previously with some photography projects and also fixed a leaky roof. (below) The old rain gutter system was a piece of wood on end that had tin bent over it to help slow and divert rainwater. The wood underneath was rotting away and previous layers of metal rubber and spray-foam had to be cut out to fix the leak.

After removing the layers, I put new metal up under the existing roof that was in good shape. I sealed and painted it. There have been no leaks since.


 Since the roof project last summer, I talked again to the owner of the Photography studio. He has been such a big help since I've known him, and he agreed to give me a deal on some space in exchange for some money and that I take care of the grounds and building maintenance. First project on the studio was to clean out the space. Over the years and past tenants it had accumulated a huge amount of rubbish. There were many old boards, 2.5 truckloads of old pallets, about 20 large flourescent light fixtures and many boxes. Unfortunately, there are no pictures of the original clutter.

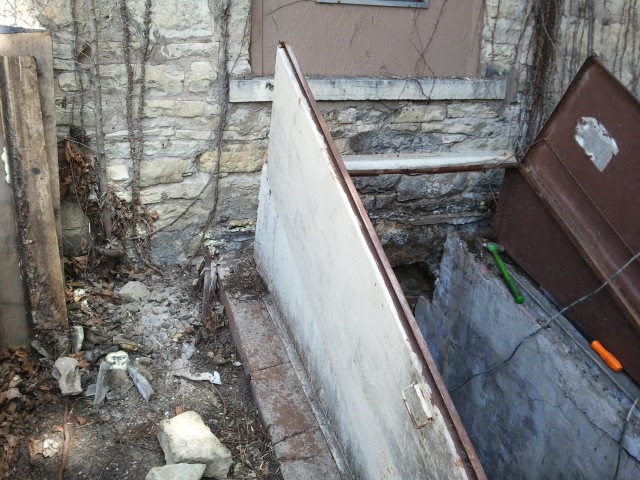
 Cleaning and repairing a leaky bulkhead door and lower door proved to be time consuming. Rotting boards and crumbling mortar have plagued the door projects. The upper door leaked and caused rotting of the lower and the starting of one project quickly lead to another.
 The gap between the building and door collected leaves, dirt, and water, which aided in rotting the boards.

 Here below, the studio is halfway clean for a little as repairs and tools shift around.
 Duct to be removed, chimney to be... or not to be...
Chimney is still there, but all loose bricks have been removed. Duct was removed, floor was patched, and missing joist was added.


 Above, one of the many doors to be cleaned out of the basement found a new home as part of the floor, The thickness of the door fit perfect.


 Light fixtures in the process of disassembly.


 Makeshift work bench from yet another door and scrap file cabinet.

 Floor patched and joist ready to be installed.

 Joist bolted in and insulation stuffed in space between studio and crawl space under addition of building.
 Ripped up several parts of broken concrete floor and patched. Many centipedes had to relocate.
 Sheet metal bender moved in... My landlord/friend Bruce donated a squirrel cage blower fan to be used for the ventilation system for the torch area. 10"ducting from the La Crosse Habitat for Humanity ReStore getting prepared for installation into existing chimney.
 Floor jack supporting floor joists before rotten boards and loose stone is removed for door frame repair.
 Loose stones removed above door frame


 Sweet table i found at a thrift store for cheap.
 Some shelving removed for additional space. Placed an ad on Craigslist for a metal bookshelf and got one.
 Bookshelf re-purposed into ventilation hood for solder/torch station. Anvil bought at antique tool dealer in Genoa. Scrap 4x4s from leftover woodpile used for anvil stump.
 Chimney had been open completely to the elements for years and needed a cap for the vent system.
Goodwill had a steel medicine cabinet/mirror that I cut in half and fitted together tighter to act as the cap and I put on an old cupola that I got for scrap.(original mirror just below workbench for size comparison)
Installation was scary on this crumbling chimney. The ladder barely sat on each edge of this 12"chimney way up on the roof. Much thanks to Lyle for the help with this and other projects.
 Outside the studio I had done some landscaping to divert water away from the door and also in the front to get gravel out of the yard from years of snow plowing. This robin loved when I was out moving dirt. I fed it by tossing worms and larvae I dug up. Every day it got closer and closer. It didn't seem to mind me 3 feet away even if I was raking.
 Door top added to my table to keep the original top protected.
 Lyle taking a break from working.
 Me cleaning the table off.
 Studio with added lights, cabinets and stuff.
 Stuff is good. Chair donated by a friend from the Vitamin Studio, formerly the Green Bay Street Studio

 Got a flex-shaft tool off of internet... UPS decided to deliver it to 4 different places before I got to have it. (creamery, auto parts store, abandoned house next door to my home and other address) Old manikin base and part of an exercise machine make a great swiveling stand for the new tool. great upgrade from the cheap dremel-type tool from the hardware store.

 First vessel from studio in progress.
 Viking ship in progress below a reference book on Vikings.


Much improvement from the unheated stowaway studio in my dads garage.


Thanks for checking back to see what I've been up to.

A BIG thank you to Bruce Defries Studio group and Lyle Schwartz for the help and support.